Assumptions: Usage of the command-line interface (CLI) is clear, PhoneGap has already been installed.
Creating a new application
1. Let’s create our first application called HelloWorld with:
phonegap create HelloWorld
A: It should print the following response:
Creating a new cordova project.
2. The next step is to go into the project with:
cd HelloWorld
3. If you list the content of the directory:
ls -l
It should print the following directory structure for your new PhoneGap
project.
We see four different directories and a config.xml file for setting up a
specific configuration for the application in general or for a specific platform.
Let’s run it to see how your first application looks; later, we will explore what
each of the directories means and how to use them.
phonegap run android
Note: Don’t worry if you haven’t added Android platform support before running
it on Android; it does all this automatically. Here is a printout of all the
actions it takes:
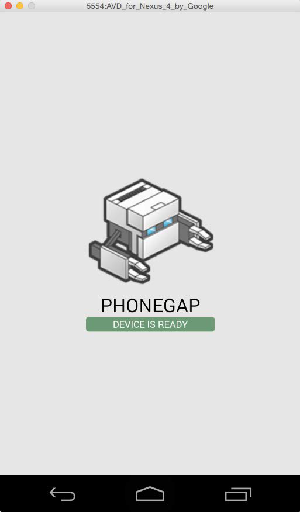
4. If you previously carried out the setup procedure, after a short moment you
should see the following screen on the Android emulator

If you Open the root folder of the project in your favorite text editor and open the www/index.html file.
You will HTML code with css and Javascript files called in the html.
One of the javascript file linked to this html controls the changes i.e index.js. There is also the cordova.js file. Every application needs to load the cordova.js file first, if you want to use PhoneGap’s plugin API; as it provides events when it is ready to use them.
Options when creating a new PhoneGap Project
What you saw above is a very simple example of how a phonegap project was created with minimum options. However there are many options and alternatives provided when creating the project in the following format:
phonegap create [options]
Let’s go over the most important parameters, as follows:
• options: There are few available options to fine tune our new project:
°° –name
°° –id
°° –template
°° –copy-from
°° –src
°° –link_to
• id: It is just shorthand writing for the options ID setting.
• name: It is just shorthand writing for the options name setting.
• config: It provides you with the ability to pass a JSON string with additional
settings that will be injected into ./.cordova/config.json file.
Here are some examples of how to use the Phonegap project creation command with Options
Task: To create an application with the PhoneGap Essentials name in the essentials directory and the com.phonegap-essentials package ID
phonegap create essentials --name "PhoneGap Essentials" --id "com.phonegap-essentials"
Task: To make a copy of the existing application with a new package ID named com.phonegap-advanced, you can copy the existing application in it.
phonegap create advanced —id "com.phonegap-advanced" —copy-from ./essentials
Managing Platforms when Creating a Project
Creating a new project is pretty much empty and it does not do a lot until you specify which platforms you would like your application to support; thus, we need to add each platform separately. (iOS, Android, Blackberry, Symbian OS etc.)
All the commands to manage the platform have in common the start of the command:
phonegap platform
NOTE: All commands should be run in the root folder of the PhoneGap project to be able to work, except the command to create a new PhoneGap project, which can be run anywhere.
Let’s see a couple of examples:
phonegap platform add ios android – This adds two platforms
phonegap platform list – Lists the platforms
That’s it for now , for creating a new Simple Phonegap application. We’ll talk about this further in our next tutorial which is continuation and about BUILDING and RUNNING THE Application.
You can check out our PhoneGap App development Services from India and find out more if you’re looking to get a Cross Platform app built.


